IDAP-Link
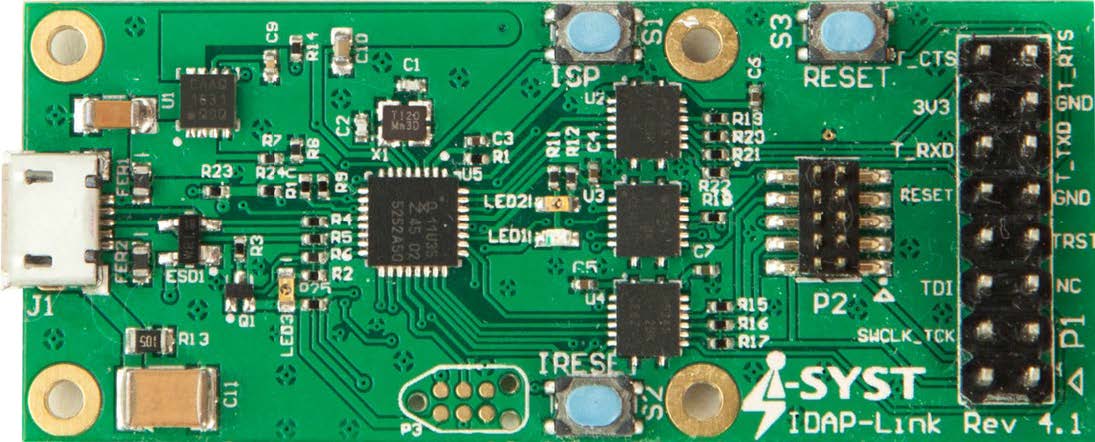
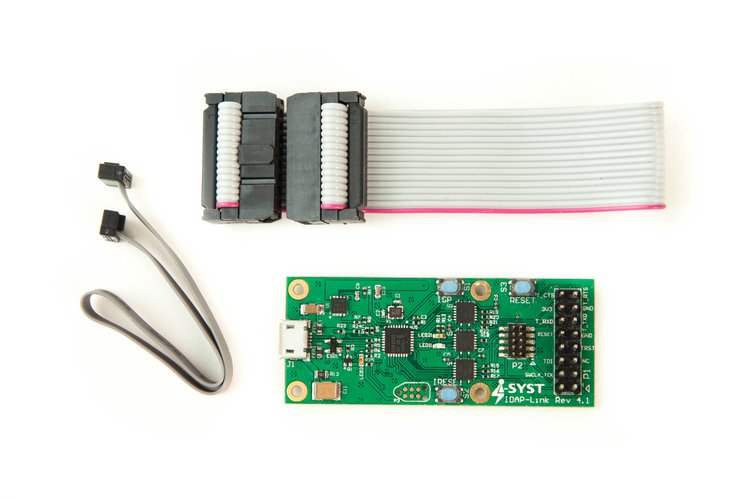
IDAP-Link
The IDAP-Link™ is a low-cost CMSIS-DAP JTAG debug probe with enhanced features.
- It can do more with it than just debugging.
- It appears as a USB disk drive that allows firmware flashing easily by copying the firmware file over without requiring any special flashing software and works instantly with any operating system.
- It provides a UART to USB bridge for communication between the target device and the PC.
- It also provides a regulated 3.3V to directly power the target device without additional power source by taking advantage of the USB power source. These features turn the target device into mBed enable.
- It can be used as an ultra-low-cost solution to production programming.
- BSP is provided for use with Open Source CMSIS-DAP firmware from mBed.org which makes it totally customizable.
- Support both SWD & JTAG mode
- Debug compatibility with most IDE such as Keil, CrossWorks, Eclipse, etc.
- Onboard 3.3V regulator to power the target device
- UART to USB bridge for communication between target and PC
- mBed enabled target board
- Firmware flashing by drag & drop simply by copying the file over micro-SD slot for flash programming without a PC
- BSP is provided for Open Source CMSIS-DAP firmware from mBed.org
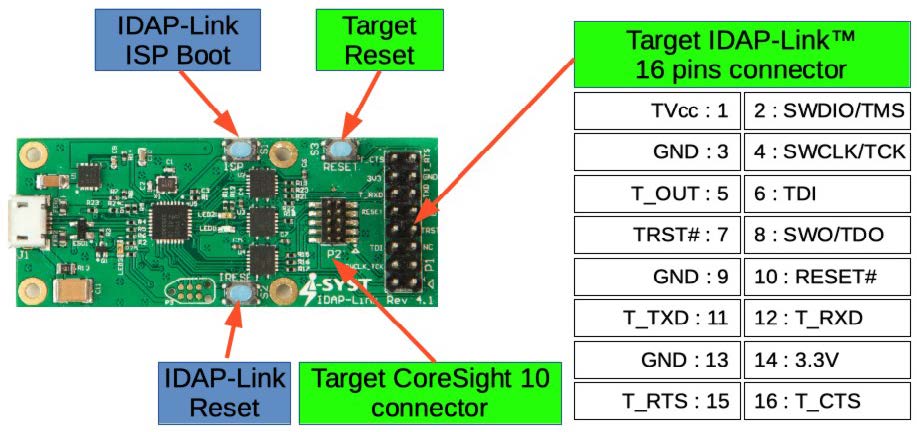
TVCC: Target Vcc. Coming from the target device.
SWDIO/TMS, SWCLK/TCK: SWD connections.
SWDIO/TMS, SWCLK/TCK, TDI, TRST, SWO/TDO: JTAG connections
3.3V: This the 3.3V supply output from the IDAP-Link. This can be used on the power target board.
T_TXD, T_RXD, T_RTS, T_CTS: UART connections
T_OUT: Digital I/O output reserved for future use
GND: Digital signal ground.
Connecting to target
SWD mode connection to target requires the following pins: TVCC, GND, SWDIO/TMS,
SWCLK/TCK
JTAG mode connection to target requires at least these pins: TVCC, GND, SWDIO/TMS,
SWCLK/TCK, TDI, TDO. TRST is optional
UART bridge: Connect T_TXD to UART TXD on target, T_RXD to UART RXD, T_RTS to
UART RTS, T_CTS to UART CTS on target and GND
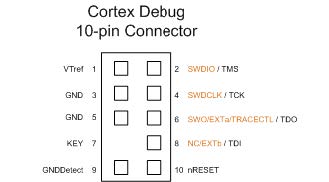
P2 – ARM Coresight 10 pins connector
The P2 is the ARM standard 1.27mm pitch 10 pins CoreSight connector.
Switches
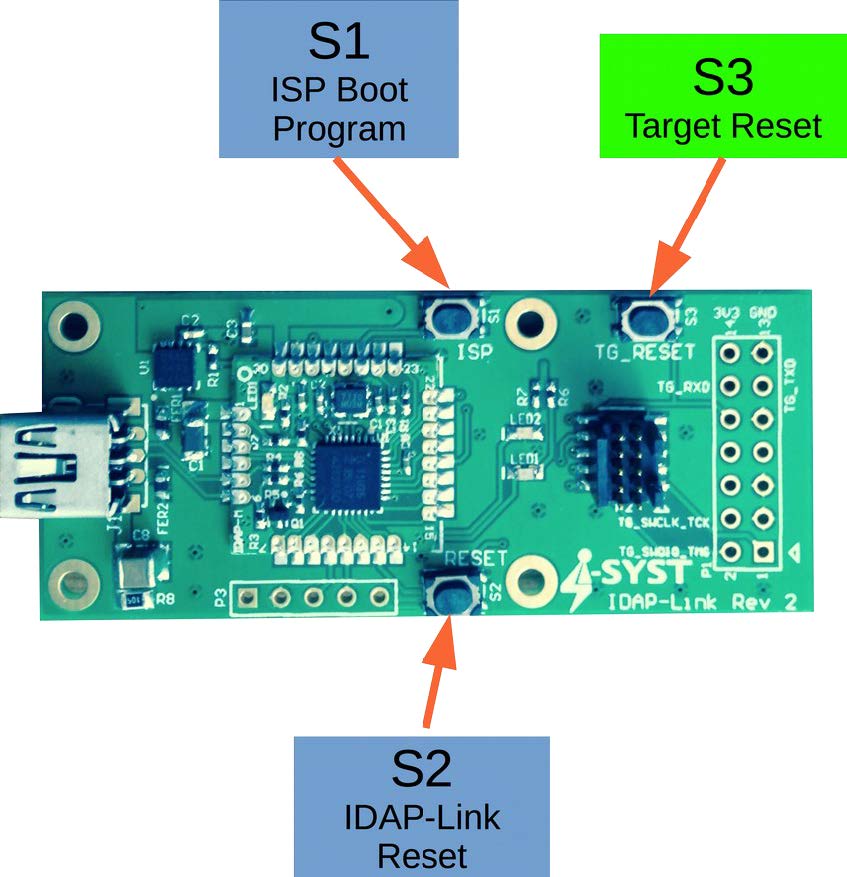
S1 – ISP boot/Program
This button is used to put the IDAP-Link into the ISP bootloader for a firmware update. Keep this button press during power-up.
When the IDAP-Link is power up without connecting to the PC, this button is used to activate the programming target with firmware load from the microSD card.
S2 – IDAP-Link Reset
This button will reset the IDAP-Link board. To put the IDAP-Link in bootloader for a firmware update. Press this reset button with the S1 (ISP) button, release S2 while keeping S1 pressed for 3
sec.
S3 – Target hardware Reset
This button is connected to the target reset pin. Pressing this button will reset the target if the target has a reset pin connected to the JTAG/SWD connector (P1 or P2)
 |
IDAP-Link at |